Although the new simplified right-click context menu of Windows 11 looks great, users who have just switched from Windows 10 might find it a little bit difficult to use. The new right-click context menu of Windows 11 hides lots of options under the ‘Show more options’ button. So, if you are someone who would like to use the classic Windows 10 right-click menu, you are reading the right guide. In this article, we will share a detailed guide on how to get the old context menu back in the Windows 11 operating system. Let’s check out. Also read: How to Create a Restore Point in Windows 11
Steps to Get Back the Old Context Menu On Windows 11
Important: Since the process requires Registry modification, please follow the steps carefully. If possible, back up your important files before following the steps.
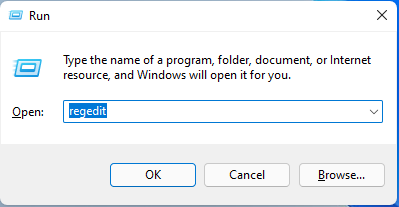
First of all, press Windows Key + R button on your keyboard. This will open the RUN dialog box.
On the RUN dialog box, type in Regedit and hit the Enter button.
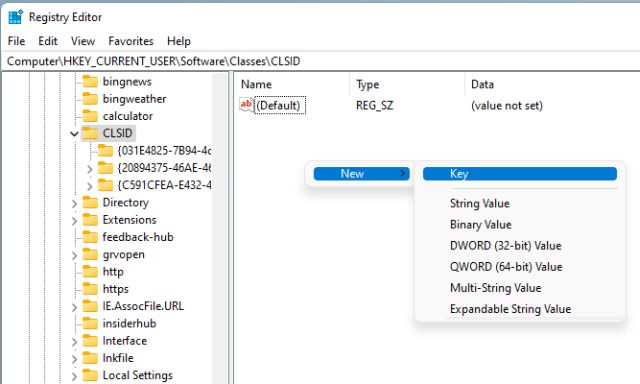
This will open the Registry Editor. Navigate to the path: Computer\HKEY_CURRENT_USER\SOFTWARE\CLASSES\CLSID
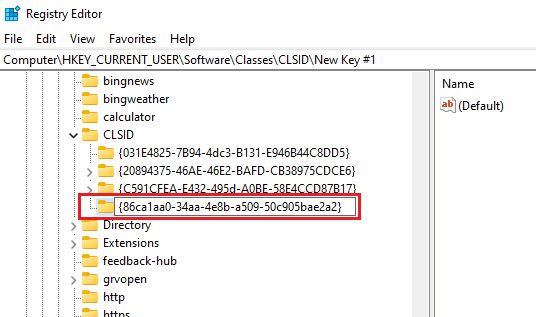
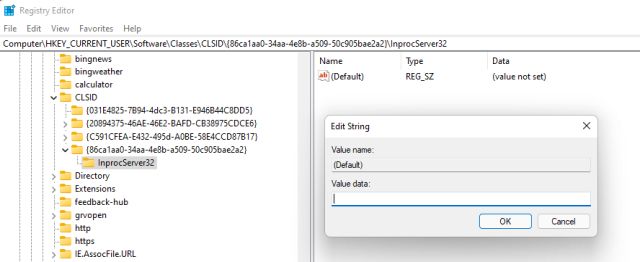
Now, under the CLSID folder, right click on an empty space on the right side and select New > Key. Then, paste the {86ca1aa0-34aa-4e8b-a509-50c905bae2a2} as the key name.
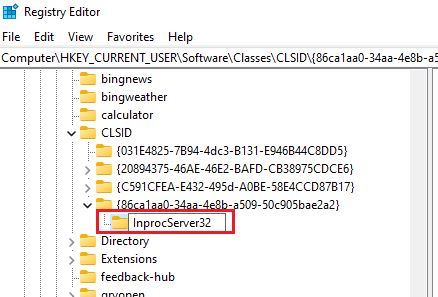
Now right click on the key that you have created and select New > Key. Name the new key InprocServer32
Select the InprocServer32 folder. On the right pane, double click on the (Default) key and close it without making any changes by clicking on the Ok button
That’s it! You are done. Now close the Registry Editor and restart your PC. After the restart, you will get to see the full right-click context menu on Windows 11. So, this guide is all about how to get the old context menu back in Windows 11. I hope this article helped you! Please share it with your friends also. If you have any doubts related to this, let us know in the comment box below.
