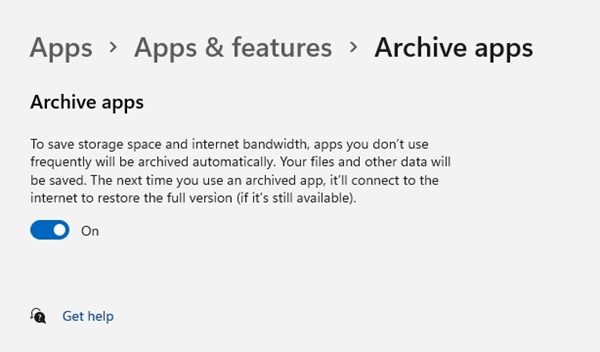
Windows 11 has a feature called ‘Archive app’ that’s designed to manage your apps automatically. It’s basically an app management feature that saves space and bandwidth by hiding apps that you don’t use. If you enable this feature, all your rarely used apps will be kept hidden. This gives the impression that the app has been uninstalled without actually removing it from the system. When Windows 11 archives an app, the app will no longer consume space on your hard drive, nor will it connect to your internet.
How to Enable Archive Apps on Windows 11
So, it’s indeed a helpful feature that you might like to enable on your computer. Hence, in this article, we will share a step-by-step guide on how to enable archive apps on Windows 11. The process will be straightforward; just implement the steps as we have mentioned. Note: When you re-open the archive apps, they will connect to the Microsoft Store and will download all pending updates.
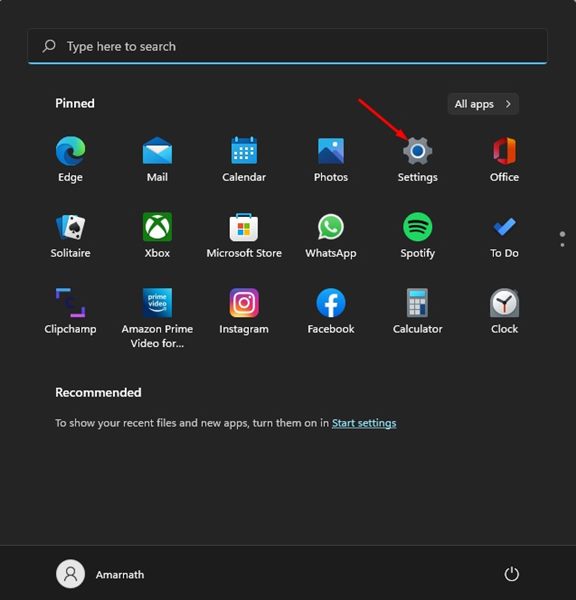
First of all, open the Windows 11 Start Menu and select Settings.
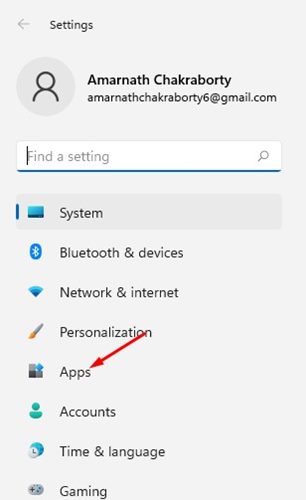
On the Settings app, click on the Apps option, as shown in the screenshot below.
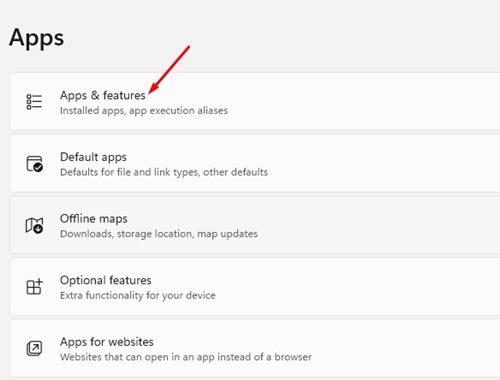
On the right pane, click on the Apps & features section as shown.
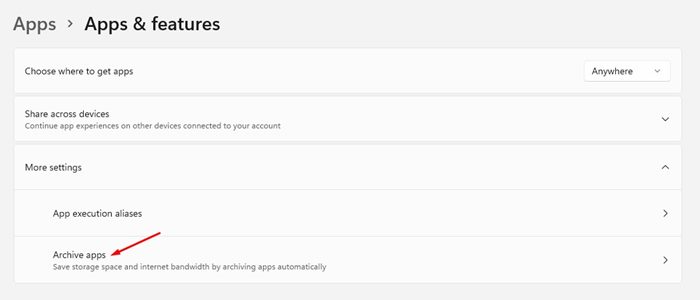
Now, you need to expand the more settings section. You need to click on the drop-down menu as shown below to expand the More Settings.
Under the More settings, click on the Archive apps option.
On the next screen, turn on the Archive Apps feature.
That’s it! You are done. Enabling this option will save storage space and internet bandwidth. Archive Apps is indeed a great feature as it automatically disables apps that you don’t use frequently. Before archiving the apps, Windows 11 automatically saves all your files & data related to that app. I hope this article helped you! Please share it with your friends also. If you have any doubts related to this, let us know in the comment box below.
