So, if you have a shared PC, then it could be a convenient feature. However, it also has a few drawbacks like until an unless the second person logs out, you can’t turn off your computer. Any other PC user can access your account along with the software that you are using. Not only that, but the signed-in accounts consumes system resources in the background. So, if you are having a laptop, then this ‘Fast user switching’ feature could slow down your computer. Microsoft’s Windows 10 doesn’t provide users any built-in feature to disable the fast user switching feature. However, you can always disable it from the Registry and Local Group Policy editor.
How to Disable Fast User Switching in Windows 10
So, in this article, we are going to share two best methods that would help you to disable Windows 10 fast user switching feature 2019. So, let’s check out how to disable fast user switching on Windows 10 PC. Note: This feature cannot be fully disabled but could be restricted which is almost similar to the disabling. We will be removing all the access points from the interface of Windows through which the users could shift to other accounts.
Steps to Disable Fast User Switching in Windows 10:
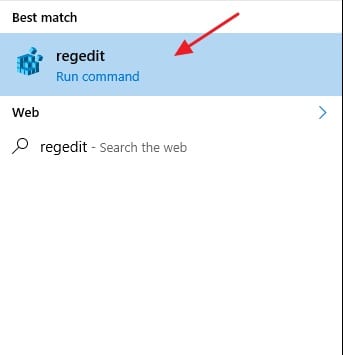
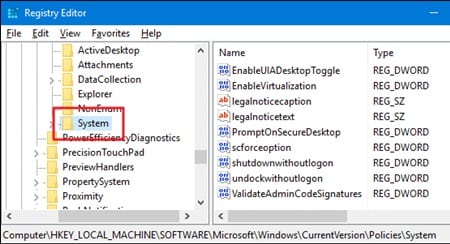
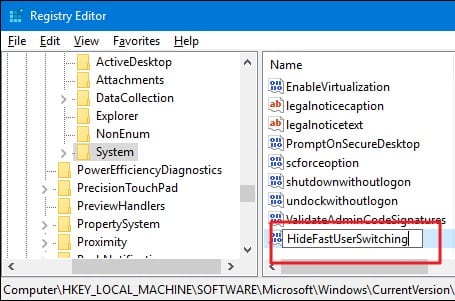
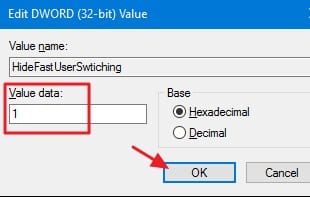
Step 1. Go to the Start menu on your Windows and then type in the Regedit keyword inside the search bar. This will show the registry editor option in the search results. Just hit enter with the registry editor being highlighted. This will launch the Registry Editor on your Windows screen. Step 2. From the left-hand side panel, navigate to the following path – “HKEY_LOCAL_MACHINE\SOFTWARE\Microsoft\Windows\CurrentVersion\Policies\System”. You will easily find this destination folder from there. Step 3. After the above step, you are at the System Key and here we will be creating the new key. To do that up right click on the System Key and then select the New > DWORD (32-bit) Value. Name that new value to “HideFastuserswitching”. Note that you have to name this value to what we have provided unless the method won’t work. Step 4. Double click on the HideFastuserswitching key that you have just created and go to its properties window. Look for the Value Data field inside and change its value from 0 to 1. That’s all, the user switching feature will be restricted from now onwards. You just require restarting your device once! The changes could be easily reverted through setting the value of HideFastuserswitching key again to 0 in the above steps.
#1 Using Local Group Policy Editor
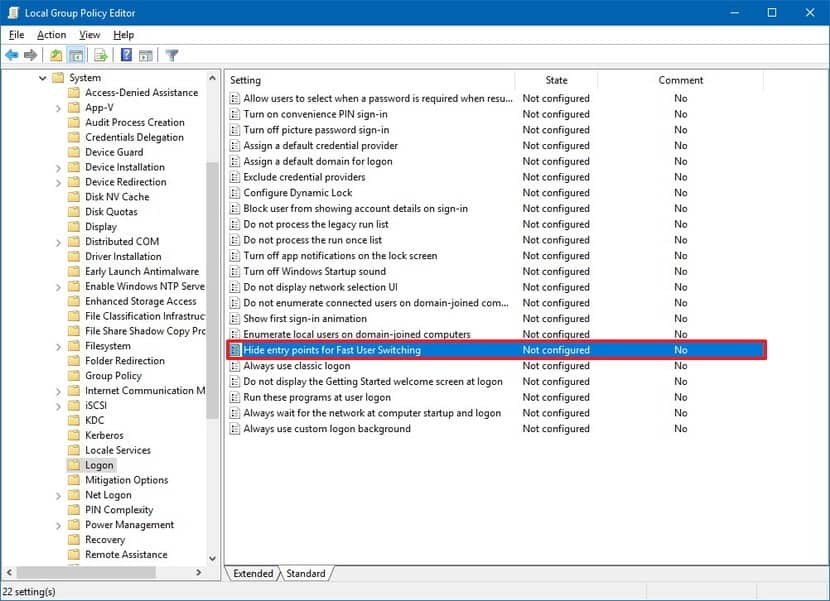
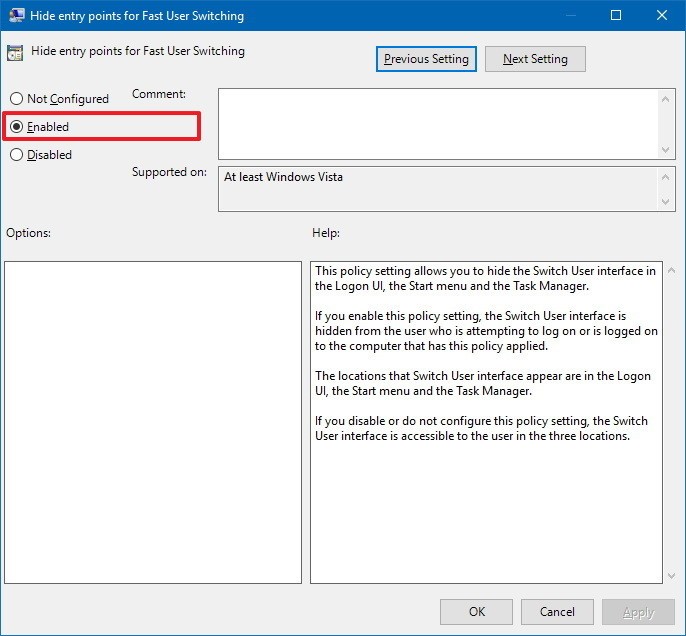
In this method, we are going to disable the fast user switching feature from the Local group policy editor. So, let’s check out how to disable Fast user switching using Group policy editor on Windows 10. Step 1. First of all, press the Windows Key + R button on your Windows 10 PC to open the RUN dialog box. Step 2. Type in gpedit.msc on the Run. It will open the Local Group Policy Editor. Step 3. Now head to the – Configuration > Administrative Templates > System > Logon and then double click on the ‘Hide entry points for fast user switching’ policy. Step 4. In the next window, select ‘Enabled’ and then click on ‘Apply’ and ‘Ok’ That’s it, you are done! This is how you can disable Windows 10’s Fast user switching feature on PC. So, this is all about the Fast User Switching feature and the process to disable it. I hope you liked the article! Make sure to share it with others also. If you have any other doubts related to this, let us know in the comment box below.